
Lily is a Customer Data Platform (CDP) that enables you to gather all your data for marketing purposes in one place. The software is integrated with several of the leading ticket vendors in the Nordic region, such as Ticketmaster, DX and TicketCo, with more integrations underway.
Lily aims to create a seamless workflow where you can sell more tickets and provide a positive customer experience by automating information and marketing for events and venues. Our platform aims to make memorable experiences the core of your marketing, through technology.
Upon logging into Lily, you will notice three main elements in the user interface: The top bar, the left sidebar, and the main content section.
The top bar includes:

If you manage multiple accounts in Lily, you will also find a skyscraper icon in the top bar, allowing you to switch between accounts.
When you log into Lily, the main content section includes key areas like “Events,” “Audience,” “Templates,” “Reports,” and “Signup Forms.” This is where you’ll find the core tools and resources that support your work on the platform. Your dashboard will also display several key popups that give you quick insights into your marketing performance and audience behavior. In the Reports and Analytics section, you’ll find clear explanations of what each of these insights mean, along with detailed event reports, visual graphs of your ticket sales, and data on your top customers, all designed to help you make smarter, more informed decisions.
When you become a Lily customer, you will receive a username and password from the Lily team so that you can sign into your account and begin sending out automated marketing campaigns.
You may sign out from the left sidebar or from the personal menu in the upper right corner. Here you can also view your account settings, make any necessary changes and view your personal profile.
The key features in Lily are Audience, Campaigns, Automations, Newsletter, Templates and Signup forms. They are all accessible directly from the left sidebar menu. You also find links to this functionality in the main content section. Here’s an overview of each of these important features, with step by step guides on how to use them.
This section is an important part of marketing in Lily. It allows you to segment and create your own target audiences based on your specific needs. Below you will find a step by step guide on how to create your first audience segment.

1. To create an audience you need to click on the add new audience button.

2. If you want to add people who attended specific events, click on “select events” and search for the ones you want to add.
3. You can also choose to create an audience based on who has attended your events for a specific period of time, such as September 1st to December 1st. Or, you can choose ticket buyers who have bought tickets from your venue in the last number of days of your choosing, such as in the last 30 days.
4. Then you can choose to add all your marketing consents as well, or you can choose to just click on this button if you want to create a segment with your Marketing Consents only.
5. You can also filter your audience based on various locations, if your venue has more than one. Meaning that only people who have bought tickets to an event in the selected locations will be a part of this audience.
6. The categories section is for people who have bought a ticket to an event with the categories you select here.
7. In terms of Signup Forms, this connects your audience to the signup form you’ve created. For instance, if you have more than 1 signup form, you can connect your audience to the corresponding form!
8. When you have added the filters, categories and locations you want, you click on filter and save and your audience will be created. This audience can be used in both "Campaigns" and "Newsletter", and will appear in these areas afterwards.
NB! You do not need to add every single filter and category to your audience, it is up to you how much you want to filter out. For instance, if you want to create an audience that attended one specific event that is completely fine. Or, if you want to create an audience with people in the last 30 days, or an audience with your marketing consents, that is also a possibility.
To upload a list of external contacts to your audience, click the pink “Upload audience” button in the top right corner of this section.
You’ll need to have your contacts saved in a CSV file. The most important requirement is that each contact must have a valid email address—this is necessary for the upload to work.
Once you click “Upload audience”, you’ll first be asked to name your upload and optionally add a description. After filling that in, click the pink button to continue. This will not finalize the upload yet, you’ll still have a chance to review and confirm the details.
Next, you’ll see a screen like the one in this image. Here, you can configure the upload:

Then, you’ll see a Preview section. This is an important step where you tell Lily what each column in your CSV file means.
For example:

This helps Lily correctly import your data and understand what each piece of information refers to. Make sure all the necessary fields, especially email addresses, are correctly mapped. Once everything looks right, you’ll be ready to finalize the upload.
Lily makes it easy to manage your audience profiles. Simply select a profile and click the pencil icon in the top-right corner to edit details such as marketing consent and event associations. This gives you full control over your audience data, allowing you to tailor communications and engagement based on individual customer cases.
Adding a Person to the Database
To manually add a person to your audience database:
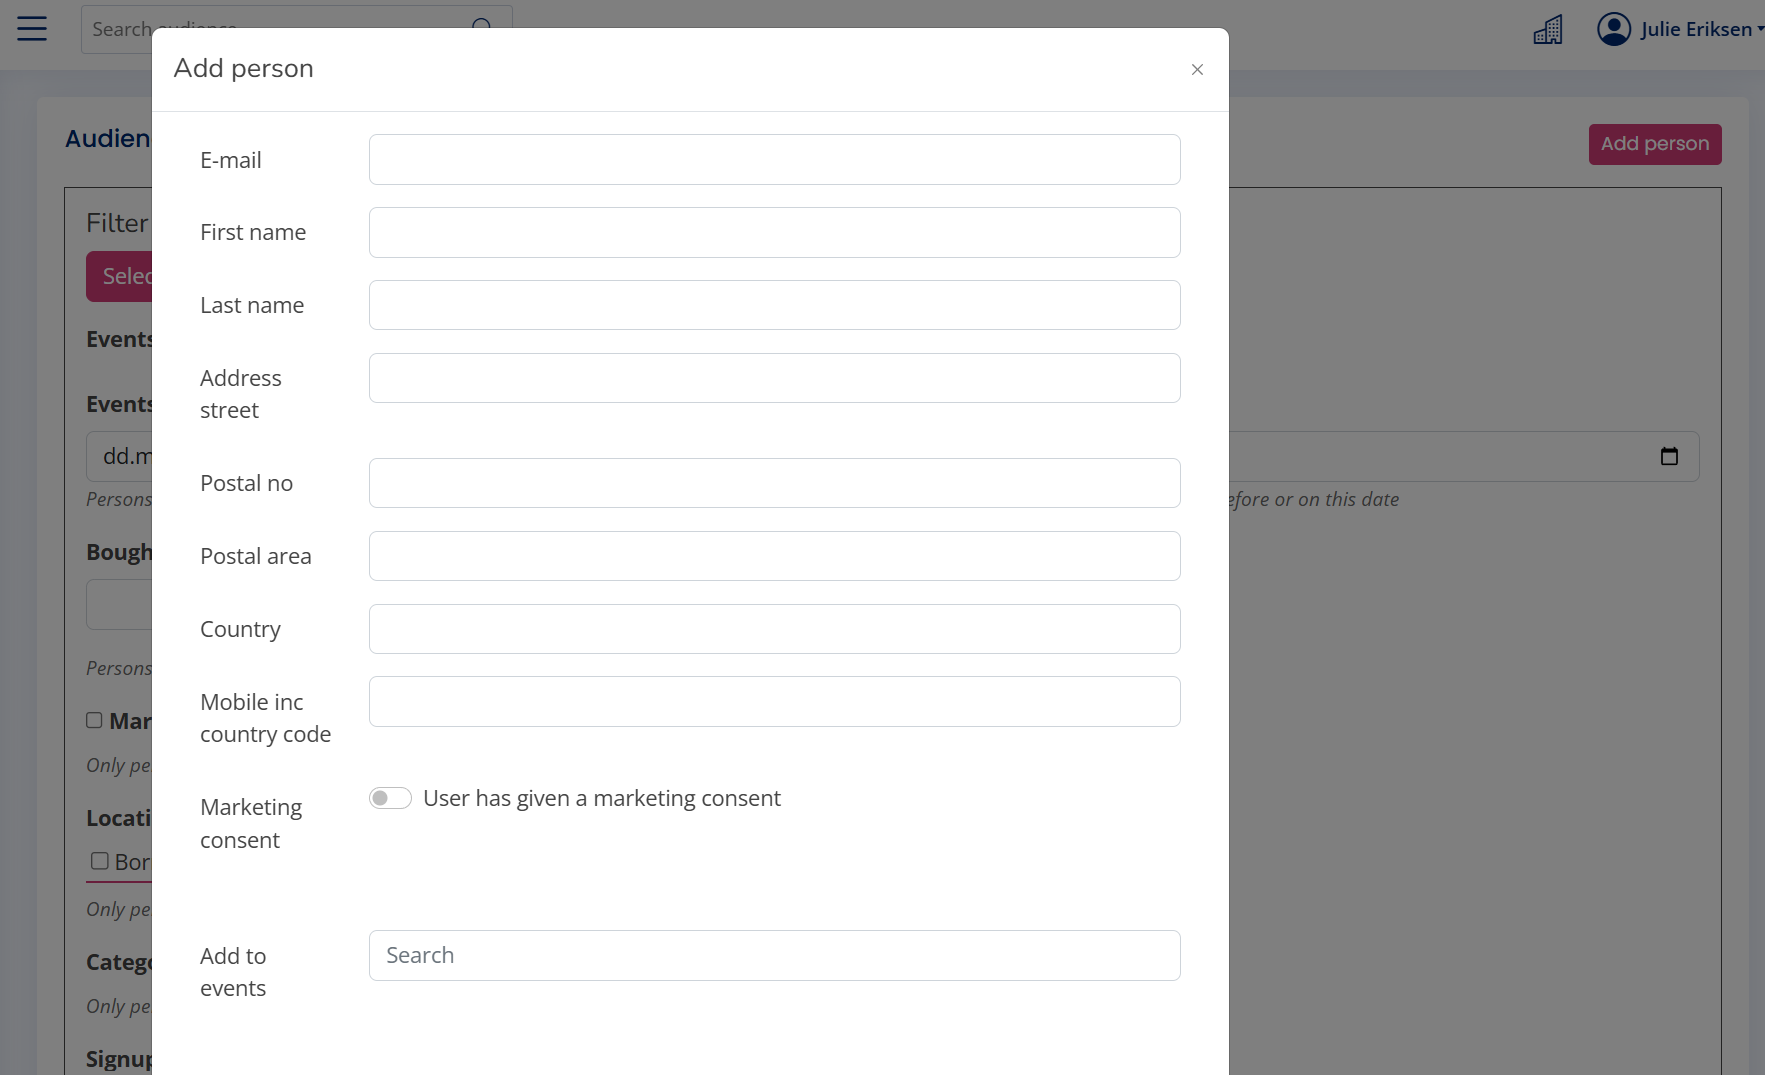
From here, you can create a customer profile with or without marketing consent:
When everything is ready, click “Save” to complete the process.
To view or edit a specific profile, click the search icon in the top right corner and type in the person’s name. When you select their name from the results, a pop-up will appear with their profile details.
This includes their contact information, marketing consent status, and, if available, a list of events they’ve attended at your venue. You’ll also see a timeline of their customer relationship with you, helping you understand how they discovered your organization and whether they’re part of your marketing audience.
Adding a Person to the Database
To manually add a person to your audience database:
From here, you can create a customer profile with or without marketing consent:
When everything is ready, click “Save” to complete the process.
To view or edit a specific profile, click the search icon in the top right corner and type in the person’s name. When you select their name from the results, a pop-up will appear with their profile details.
This includes their contact information, marketing consent status, and, if available, a list of events they’ve attended at your venue. You’ll also see a timeline of their customer relationship with you, helping you understand how they discovered your organization and whether they’re part of your marketing audience.
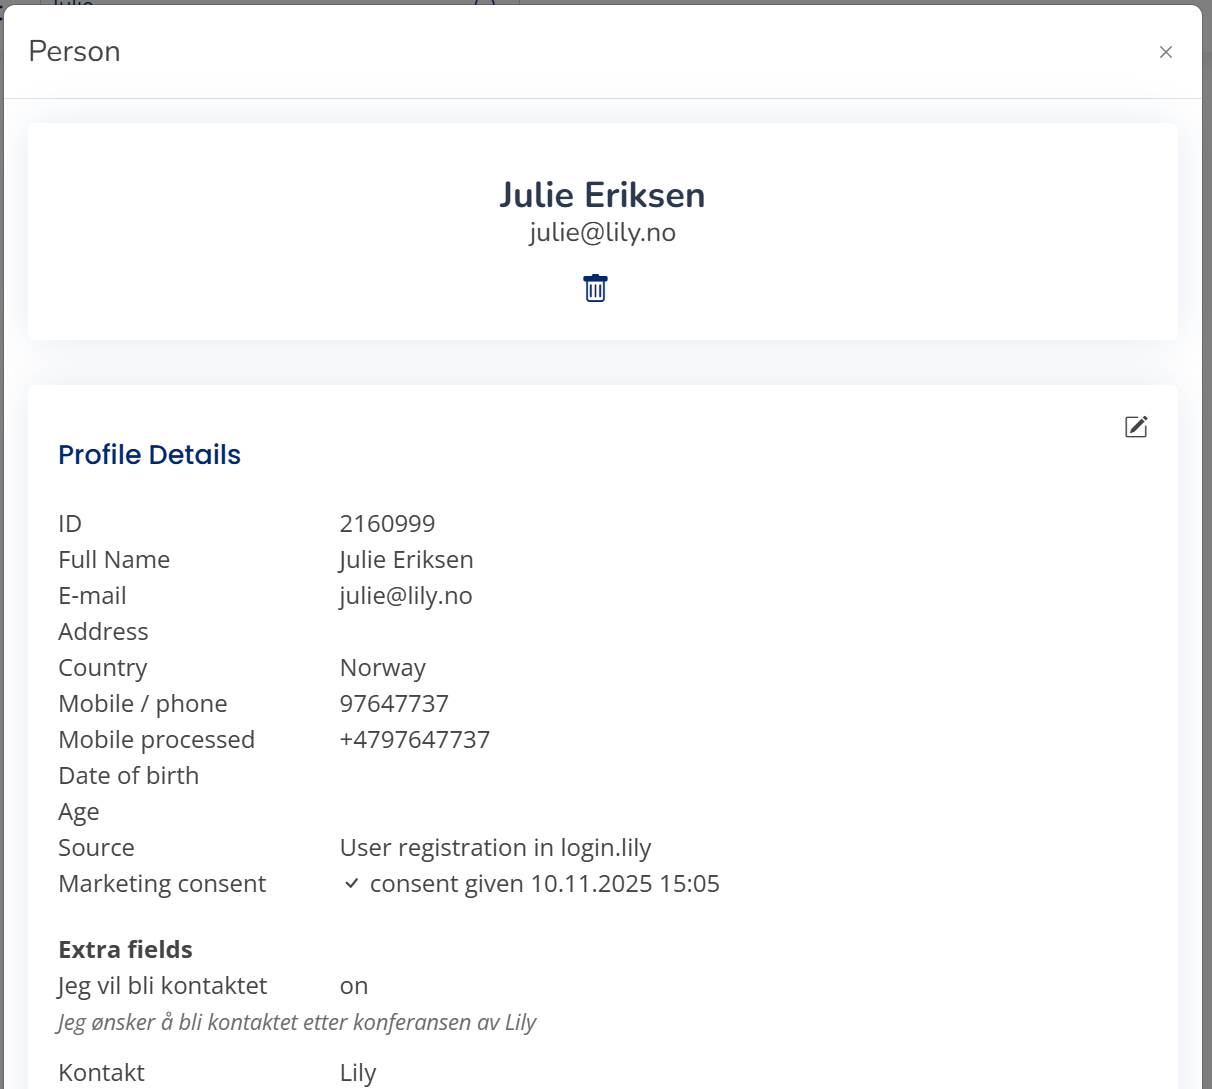
Want to remove marketing consent or events from a contact? Find their profile via the search icon and click on their name. Right below their name you find the trash can icon, and if you click on it you will be able tocompletely remove this contact from your database in Lily.
“Campaigns/Push” is the area in Lily where you prepare and send email and SMS campaigns directly to your audience, both ticket buyers and marketing consents. This function is mainly used for:
1. Marketing a specific event where you wish to sell more tickets, or send out last minute information directly to your ticket buyers.
2. Newsletter campaigns to your marketing consents, which you have created in the templates section.
The procedure is the same for both types of campaigns, consisting of 5 steps.
1. Type: When sending out communications, you’ll need to choose between two content types:
These distinctions are essential to ensure compliance with marketing laws. Then you choose which channel you want to use, SMS or email.

2. Target Group: In the second step you can select the audience you want to send your message to, either by selecting it in the drop down menu. If you want to combine multiple audiences, tick the boxes below for the ones you want to add to your campaign.
3. Content: Then, you choose your email subject line, or the message content of your SMS campaign. If you are sending an e-mail, you only have to decide on your campaign's subject line, such as “Welcome to this week's newsletter from X”.
For SMS campaigns, you add your text and a CTA link, usually a link for purchasing tickets to your event. The unsubscribe link will automatically be added, so you will not need to include this, which is also why it will say a higher number of total characters, because it will include the characters from the unsub line. Your messages can only include 160 characters, if it exceeds this limit it will be considered as 2 and the cost per SMS will be double (Just keep this in mind).
4. Review: For SMS, you'll see the full message, including the unsubscribe line, but without your selected spacings. To ensure it appears correctly for your audience, send yourself a test message:
A confirmation message will appear, clarifying that this is just a test and not being sent to your full audience. This allows you to adjust spacing and text length as needed. Once satisfied, uncheck the test button and schedule your SMS for delivery.
For email, the process is similar, but you'll need to select the correct template before proceeding. Ensure your template is saved under Campaigns in the Templates section. We strongly recommend sending a test email to yourself to check how it appears on both desktop and mobile before finalizing your send.

5. Receipt: In the final step you will get a Receipt about the state of your sending. If it went well, you would get a success message: “The batch is sent!” also showing how many people will receive it.
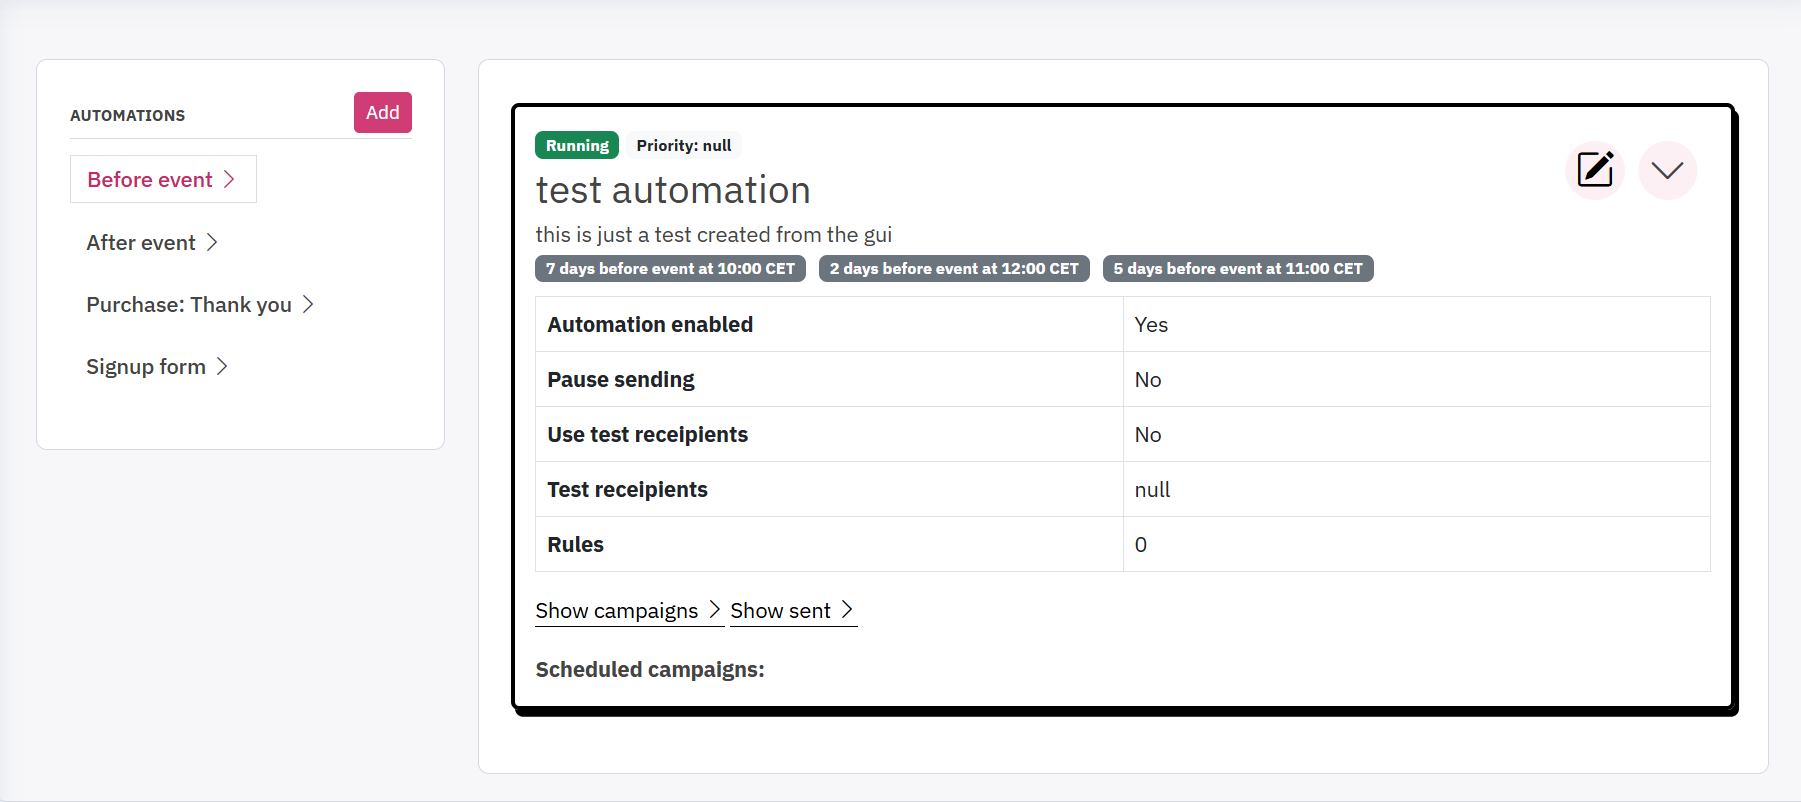
In this section, you get an overview of your preplanned email campaigns, called Automations These scheduled campaigns go out at a specific time before your events, after events or after a ticket purchase. Lily can send out your preplanned emails to an ever-growing list of recipients, streamlining this area of communication.
Lily groups the campaigns into four sections: Before event, After event, Thank you, and Signup form messages sent after a ticket purchase.
Before event is usually sent out 1-3 days prior to the recipientsevent, to inform about possible changes, opening hours and other necessary info.
After event can be sent out to thank you for visiting your venue, inform about your upcoming events, specialoffers etc.
Thank you messages can be used to thank the recipient immediately after purchasing a ticket, with sections including discounts if they bring a friend or similar, as well as other special offers or important information etc.
Signup Form is an preplanned email campaign created whenever a new person signs up to the corresponding signup form.
In each of these sections, you can review the following:
The following steps will explain how to set up an automation in your Lily account. Bear in mind that automations must be scheduled at least one day in advance, before 12pm. So, if you want an automation to go out on Wednesday, you’ll need to set it up by 12pm on Tuesday at the latest.
Step 1. On your dashboard you scroll down to "Active automations" and click on the "Set up new" button. Here you choose your automation type (before, after or thank you), and click on "Add".

Step 2. Then you will be redirected to the Automation edit page, where you firstly give it a name. Then, in the "Description field" shortly describe the automation and what it is for.
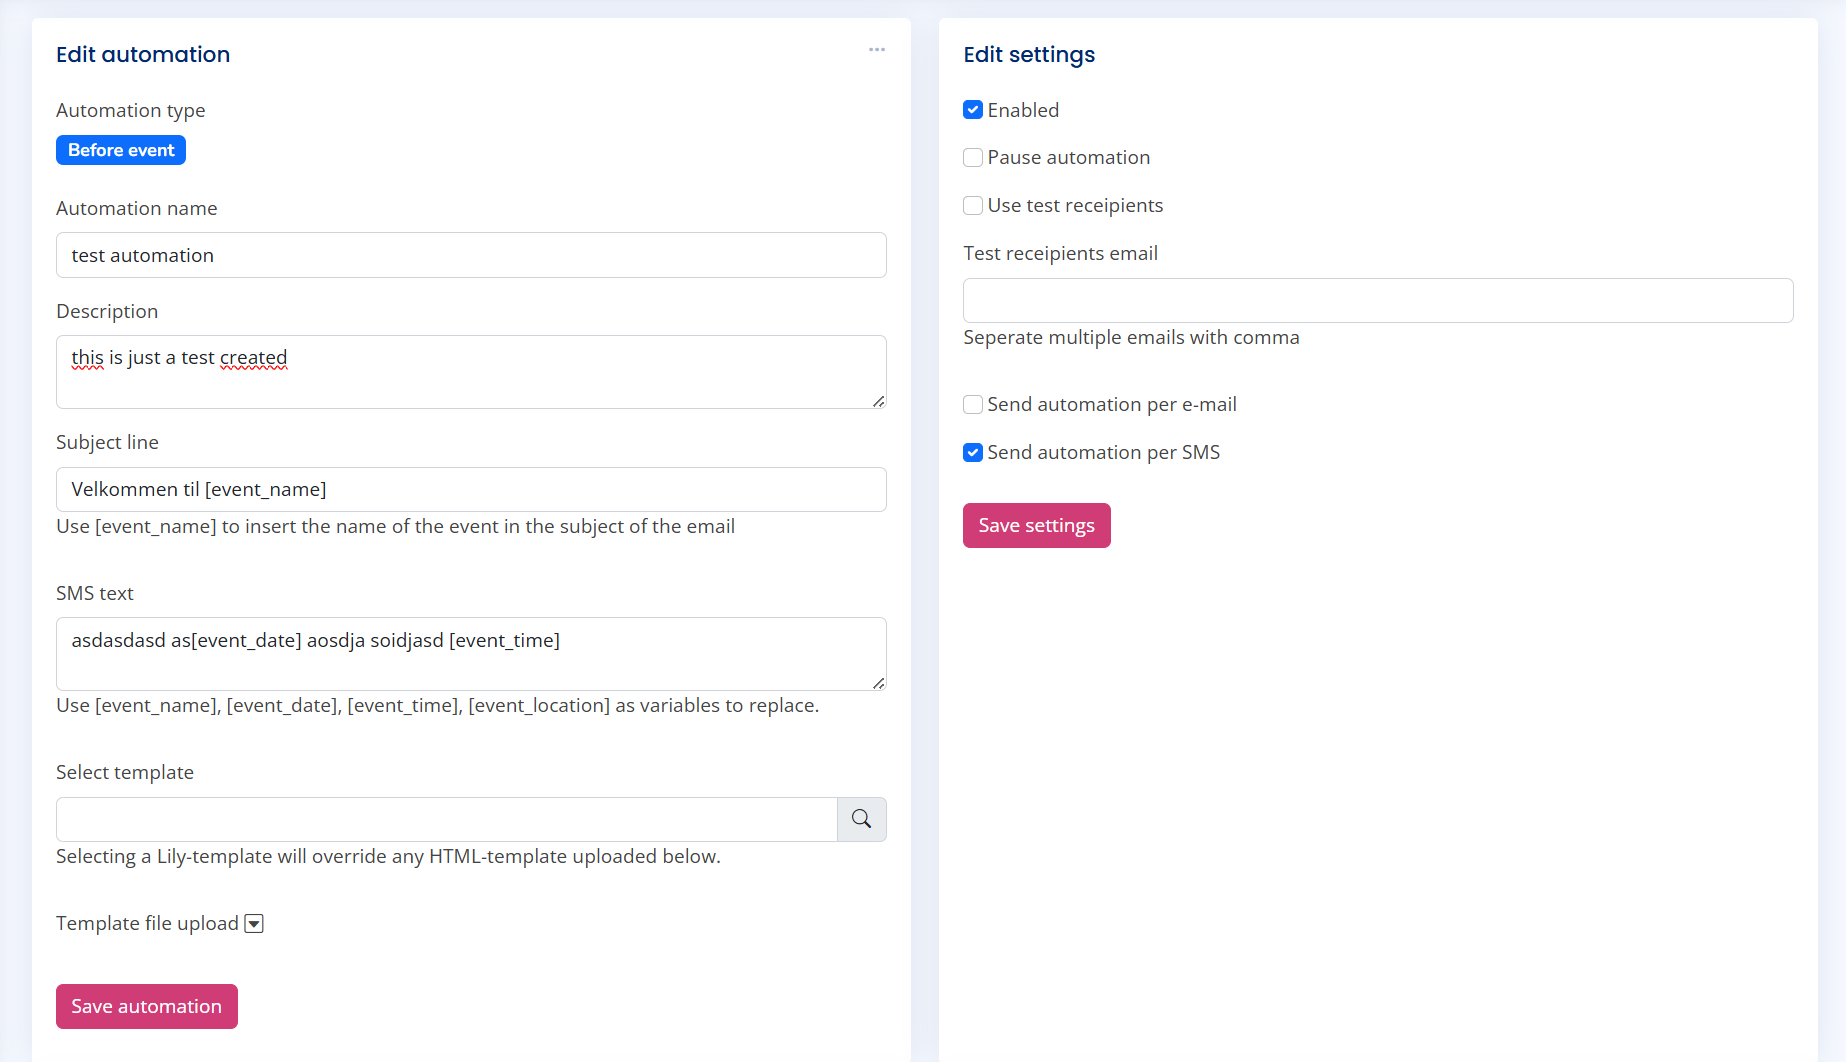
Step 3. If you want to send out an SMS in addition to the automated email, you can do so in the "SMS text" field, using the variables [event_name], [event_date], [event_time], [event_location] as placeholders.
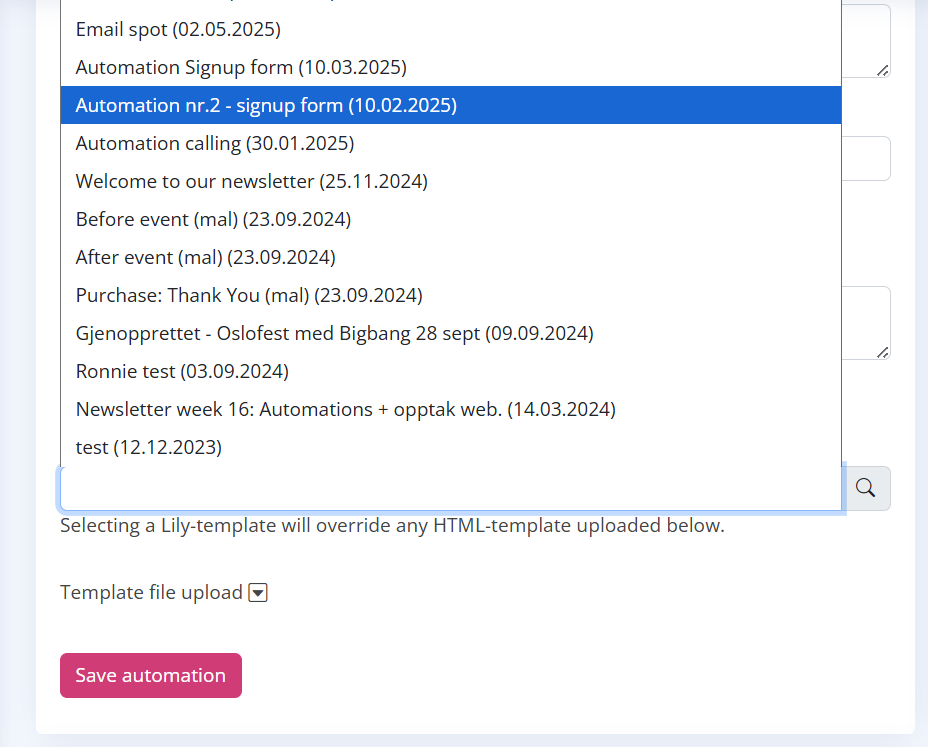
Step 4. Choose or upload your template: You can now select a template directly in Lily from the built-in template library, or upload your own HTML file if preferred. Make sure to preview the template to confirm that everything looks correct before you click Save automation.You can either upload your own HTML template or select one of the ready-made templates available directly in Lily. If you choose a Lily template, it will automatically override any uploaded template.
You can also create automation templates in the Template Builder application. Any templates you create there will automatically appear as selectable options when choosing a template inside Automations, making it easier to get started and maintain consistent designs.
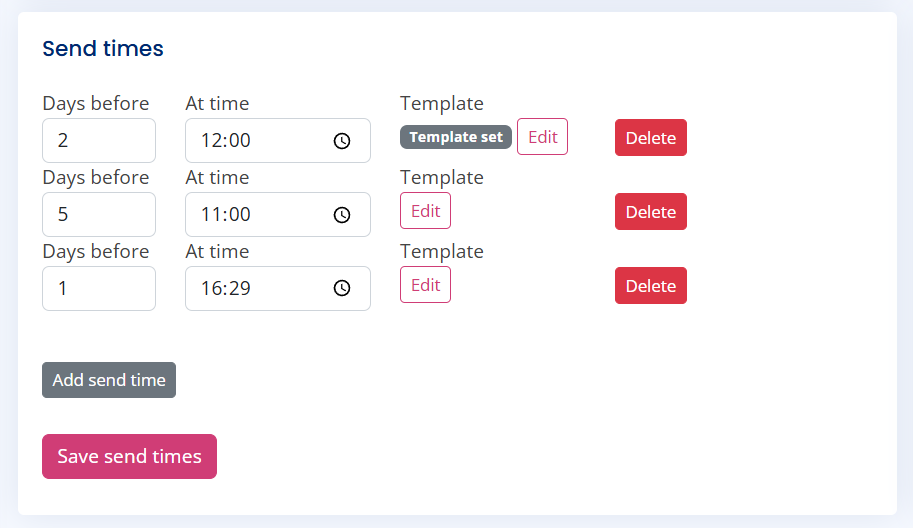
Step 5. Choose your send times — and assign templates to each time: add one or more send times, for example 7 days before the event at 10:00, and click Save.
Step 6. In the "edit settings'' section you can choose your settings for the automation. You can enable or pause, choose to send it out via email or SMS, in addition to sending yourself a test. When you've chosen the settings you want, you click save and the automation will be up and running!
Step 7. If your automation is going to a specific event, or you want to exclude an event from receiving the automation, you need to add a rule in the “Rules” section. A window will pop up where you first filter the rule by i.e. Event name, date, code etc depending on your needs. Then you choose the rule type, and paste the rule expression in the type field. For example:
For example:

Step 8. To send out a test email, you have to go to the Automation section on the left hand side in Lily, find the one you created, click on the arrow next to the automation title and click on "show campaigns''. Here you can preview one of the campaigns Lily has created and scroll down to the "send test-mail" section.
Is your event canceled? Then you also have to cancel your automation! Until midnight the day before the event, the automation must be canceled. Some ticket systems automatically cancel in Lily, some DON'T! Important information about your ticket system and canceling in Lily:
BUT: Eventim customers WITHOUT a JSON feed do not automatically cancel events in Lily.
Eventim customers WITH an event feed (currently only Vega) have events canceled and updated every hour.
Ticketmaster: events are canceled if the cancellation is made the day before.
Other ticketing systems: need to check.
The "Automated Newsletter" is empowering you to effortlessly connect with all contacts who have granted marketing consent, or have visited your venue. Keep your audience informed with the most recent news and insights without having to create a new template for each sendout. Create an automated newsletter step by step by following the guide below.
Step 1: Select Template
Either the ready-made template you selected, or other templates you have created and saved as a Newsletter in the Template Builder will appear here, ready for you to use. Simply choose the template you prefer and continue to the next step.
The ready-made Lily Newsletter Templates include two layout options for how events are displayed:
Choose the design that suits your newsletter best.
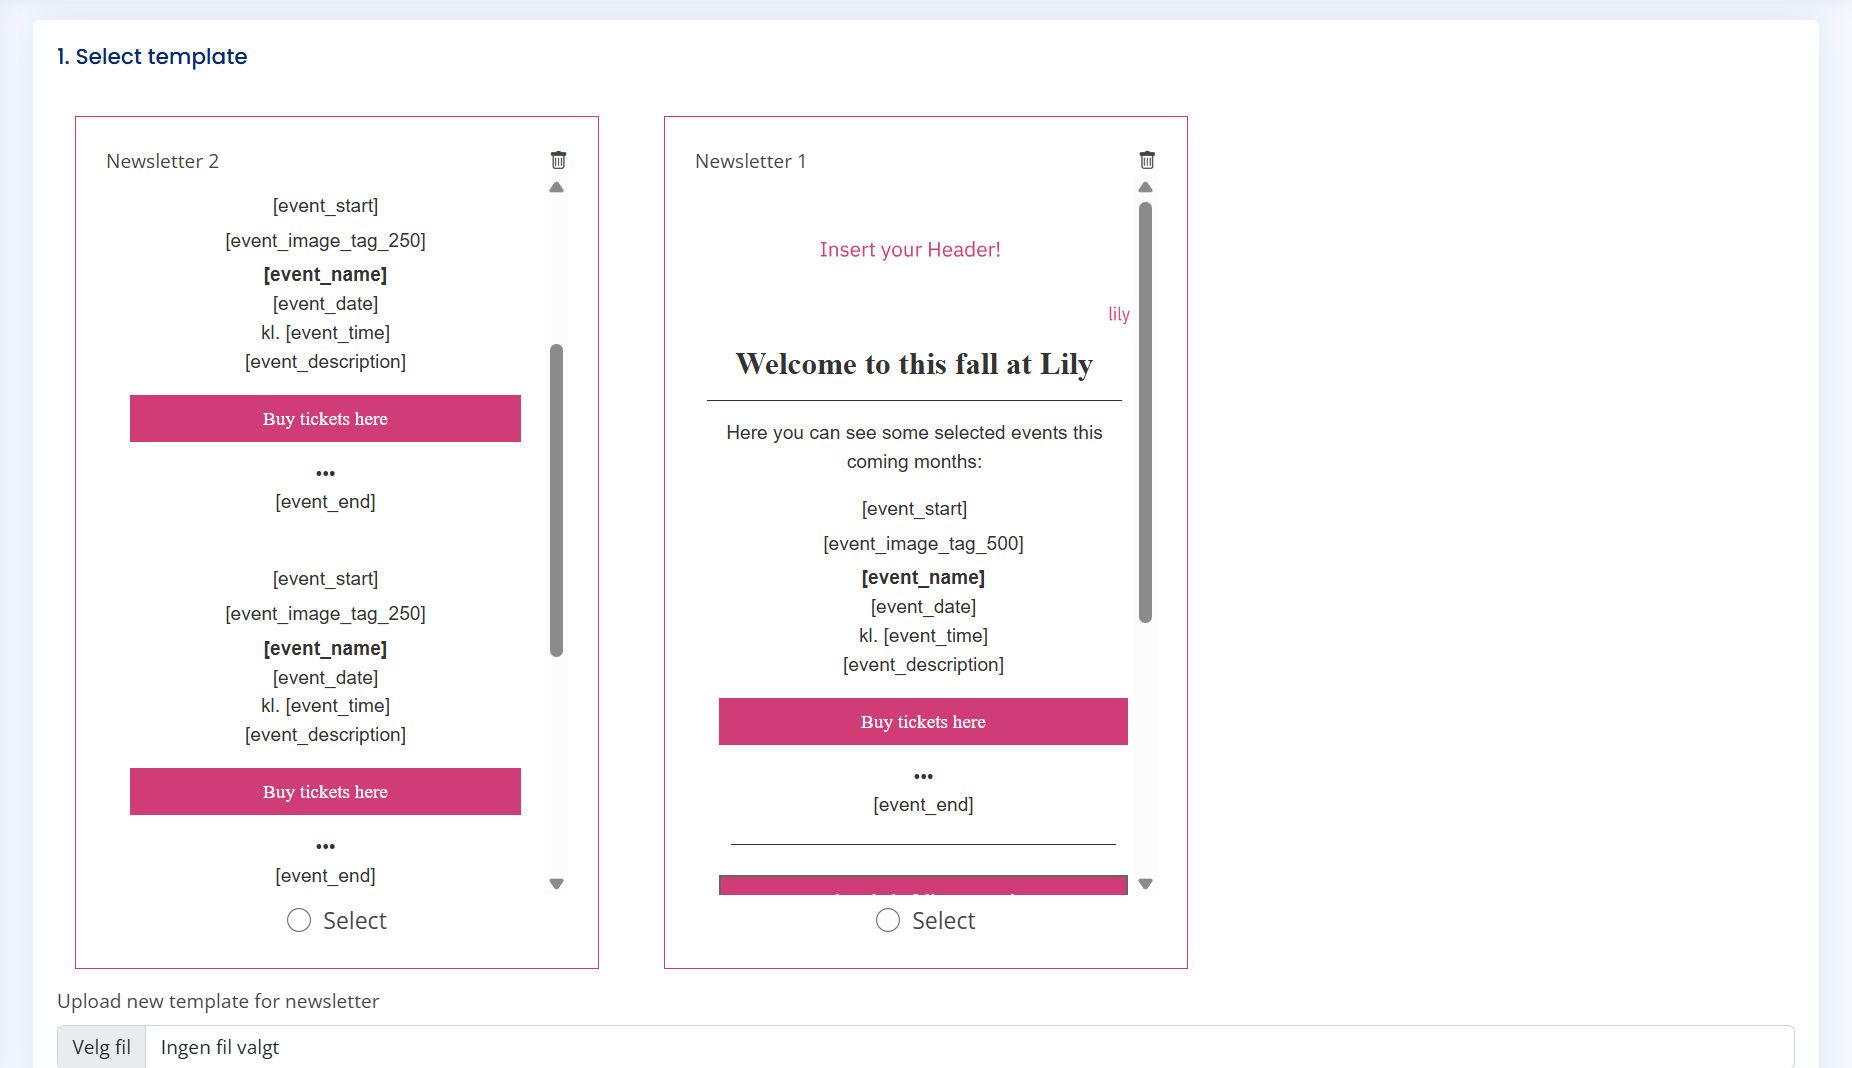
Tip: If your events come from different ticketing platforms — as is the case for some of our customers — the event images may have different sizes or dimensions. When using the two-column layout, this can result in an uneven or asymmetric appearance.
To ensure a clean and consistent look:
This helps keep your automated newsletter visually polished and fully streamlined.
Step 2: Add events you would like to promote
Add events by several options; days ahead, tickets sold, categories or location. Why not all of them? Tailor the newsletter to you specific needs and goals of the campaign!
There are 4 different options for segmenting the different events that will automatically appear in your newsletter.

Tickets sold from %: Write the lowest % sold of your upcoming events, or a higher % of your choice.
Tickets sold to %: Write the highest % sold of your upcoming events.
Add events from the interval by your choice.
You can create several combinations of options!
Added events will be shown to the right, and will automatically be included in your newsletter feed of upcoming events.
Step 3: Select Audience
Select the audience you want to connect with.
You may choose between all marketing consents, test audience, tester audience and ticket buyers for the last two years.
The audience you select, will receive your newsletter.
Total recipients: x fans in your selected audience.
Audience table: personal information about your audience.
Step 4: Preview and edit newsletter

In this section, you are able to see the added events in your automated newsletter.
Lily goes the extra mile by incorporating images, links, and other pertinent details that you have included in the ticket system, enhancing the visual appeal and informativeness of your newsletter.
Even when it`s automated, you still have control. Edit directly in the preview, and make the changes yourself.
Step 5: Schedule testing
Before reaching your audience, each newsletter undergoes rigorous testing. Nothing is sent without your explicit approval, ensuring that the content aligns with your expectations in both appearance and readability.

Choose “test only” and “test recipients”, which may be your own email. Then type in an email subject, and schedule your testing
Step 6: Schedule sending
Stay in the same section, and remove the “test only” button. Determine the frequency of your newsletter send-out and choose the optimal day and time for distribution to your audience.
Push “confirm and send”.
We’ve made it easier, and smarter, to design engaging and beautiful newsletters, campaigns and automations here in Lily. With this brand-new version of our Template Builder, you can now create, customize and test templates faster than ever before. Here's how it works…
Sending an email campaign — or setting up an automation — has never been easier.
Start by clicking on the “Create new template” button in the top right corner. This takes you to the new Template Library, where you can:
Tip: Remember to click Save Template regularly while working, as your progress isn’t auto-saved!
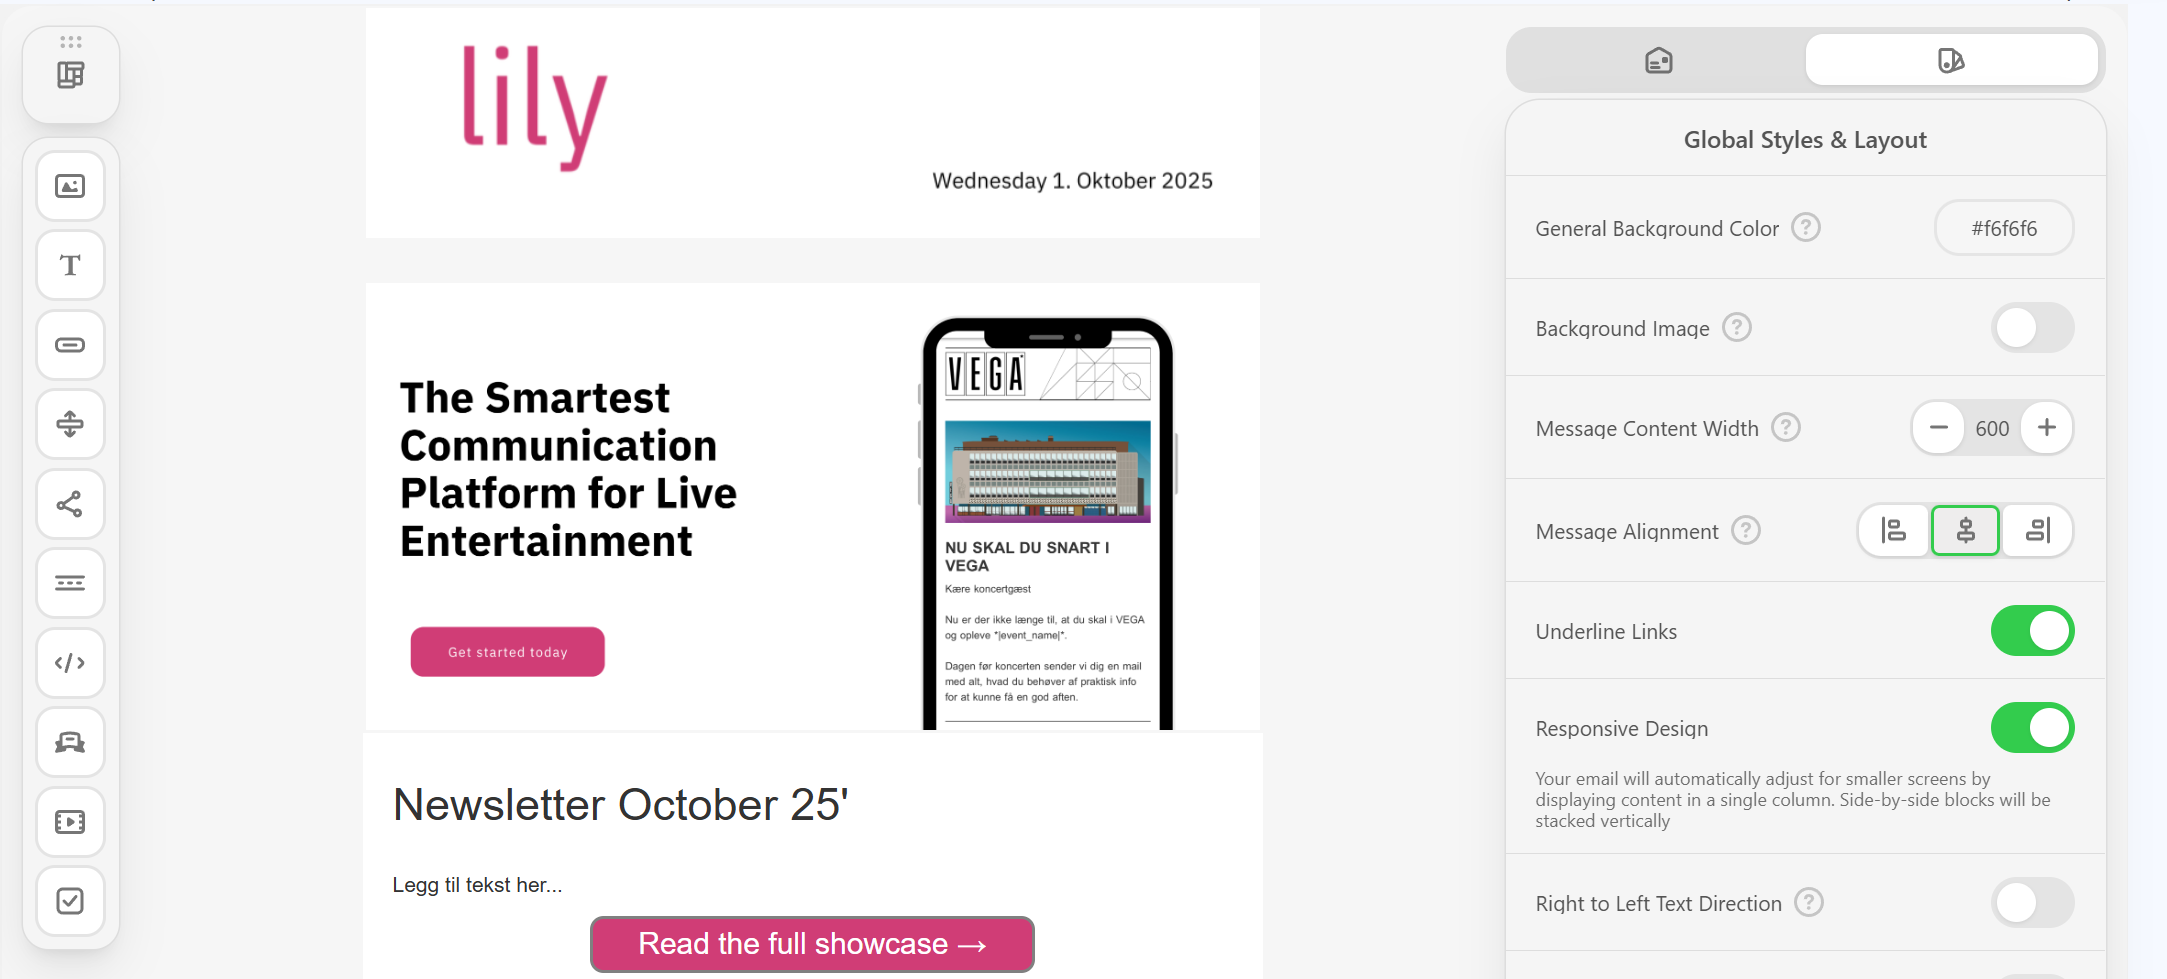
The new design gives you a clear overview and quick access to everything you need:
Message width: Choose the width of your newsletter, push, or automation (max. 600px).
Message alignment: Decide whether your message should be centered or aligned to one side.
Default padding: Adjust margins on the sides (e.g., 20 left and 20 right).
General background color & font: Set a default background color and font for your email.
Tip: You can also go to Message Settings (In the global styles tab, top left button/icon) to:

Select the “Heading tab” to define your tile styles. Here you can:
This helps you keep newsletters consistent and on-brand.
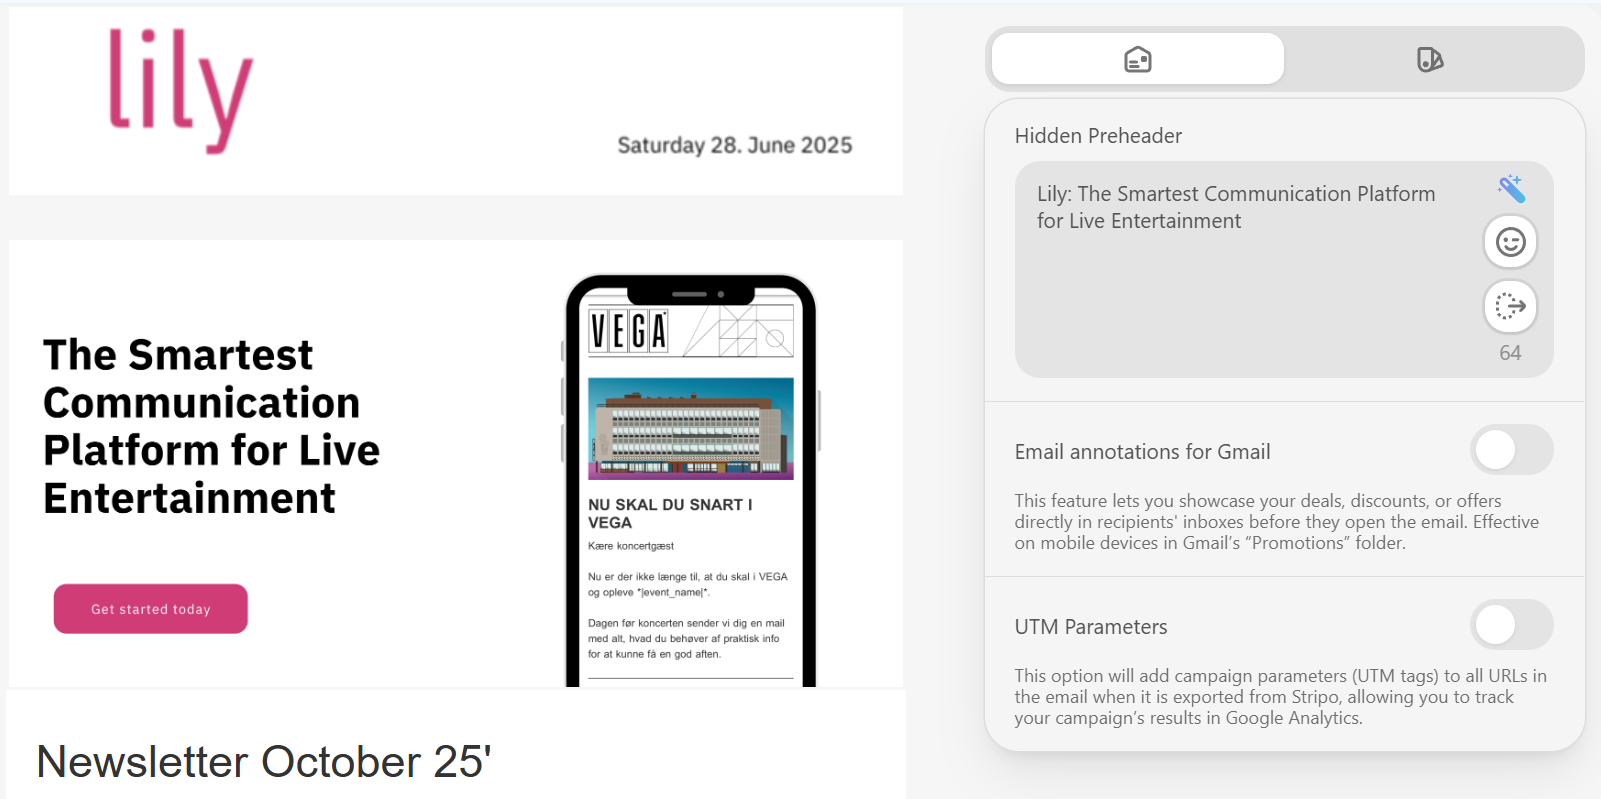
When starting from scratch, click on the “Insert header here” block, where the image tab will appear on the right hand side. Click on the round icon “Replace Image”, and:
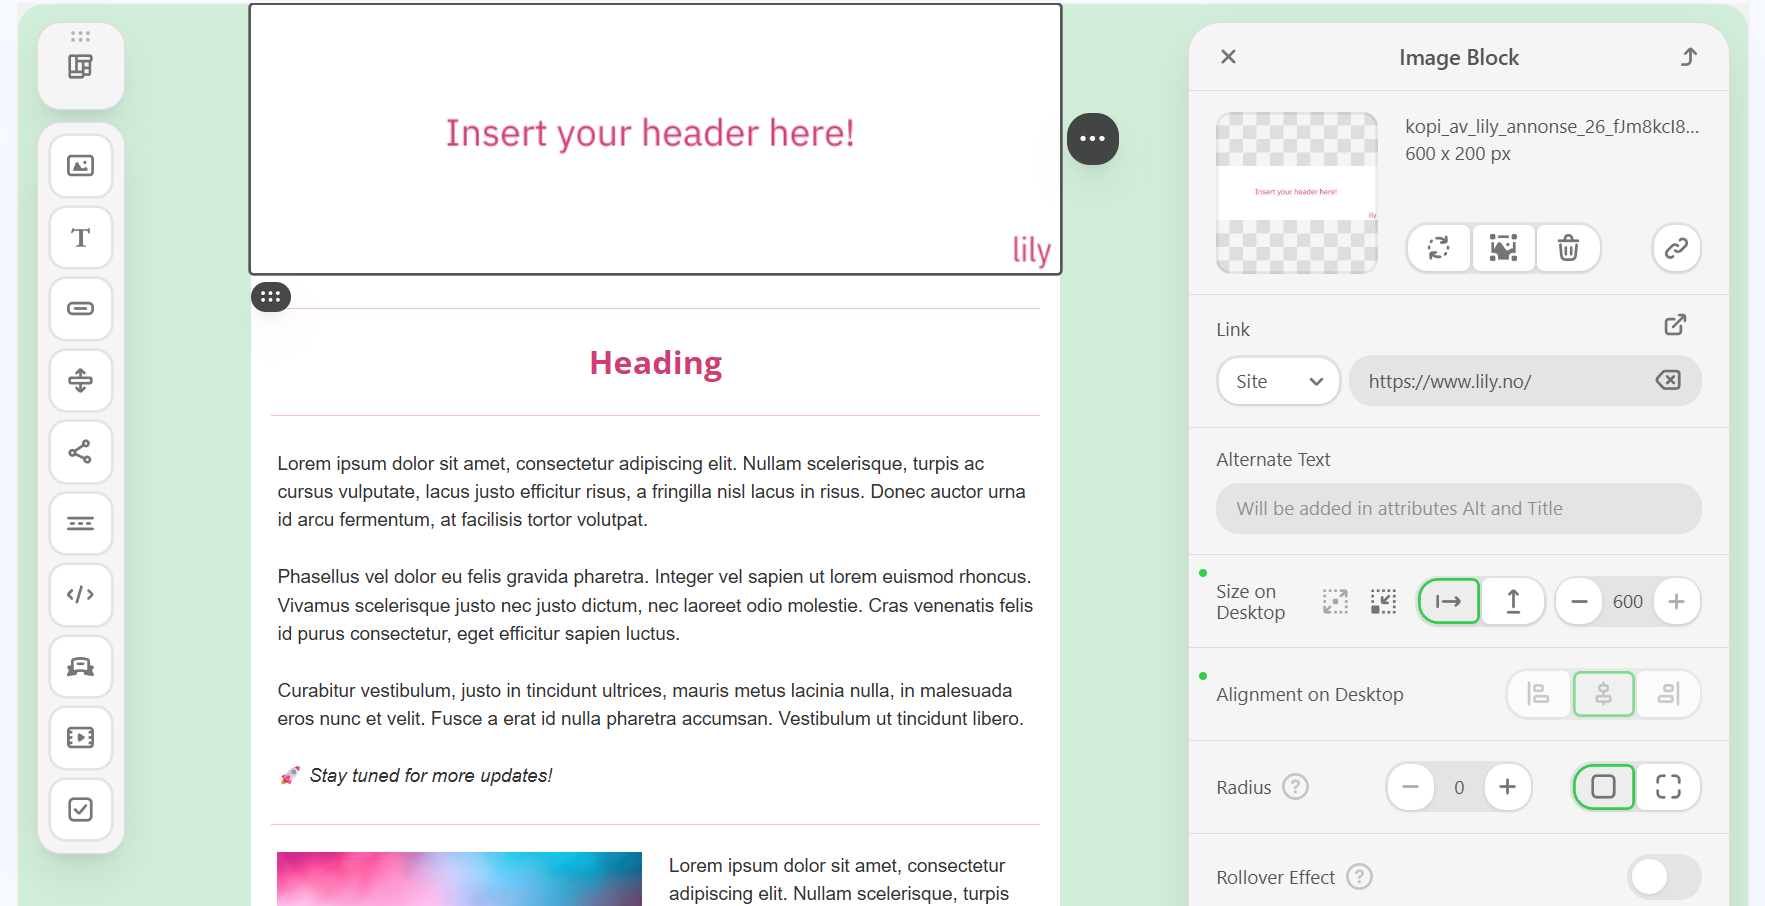
To edit text:
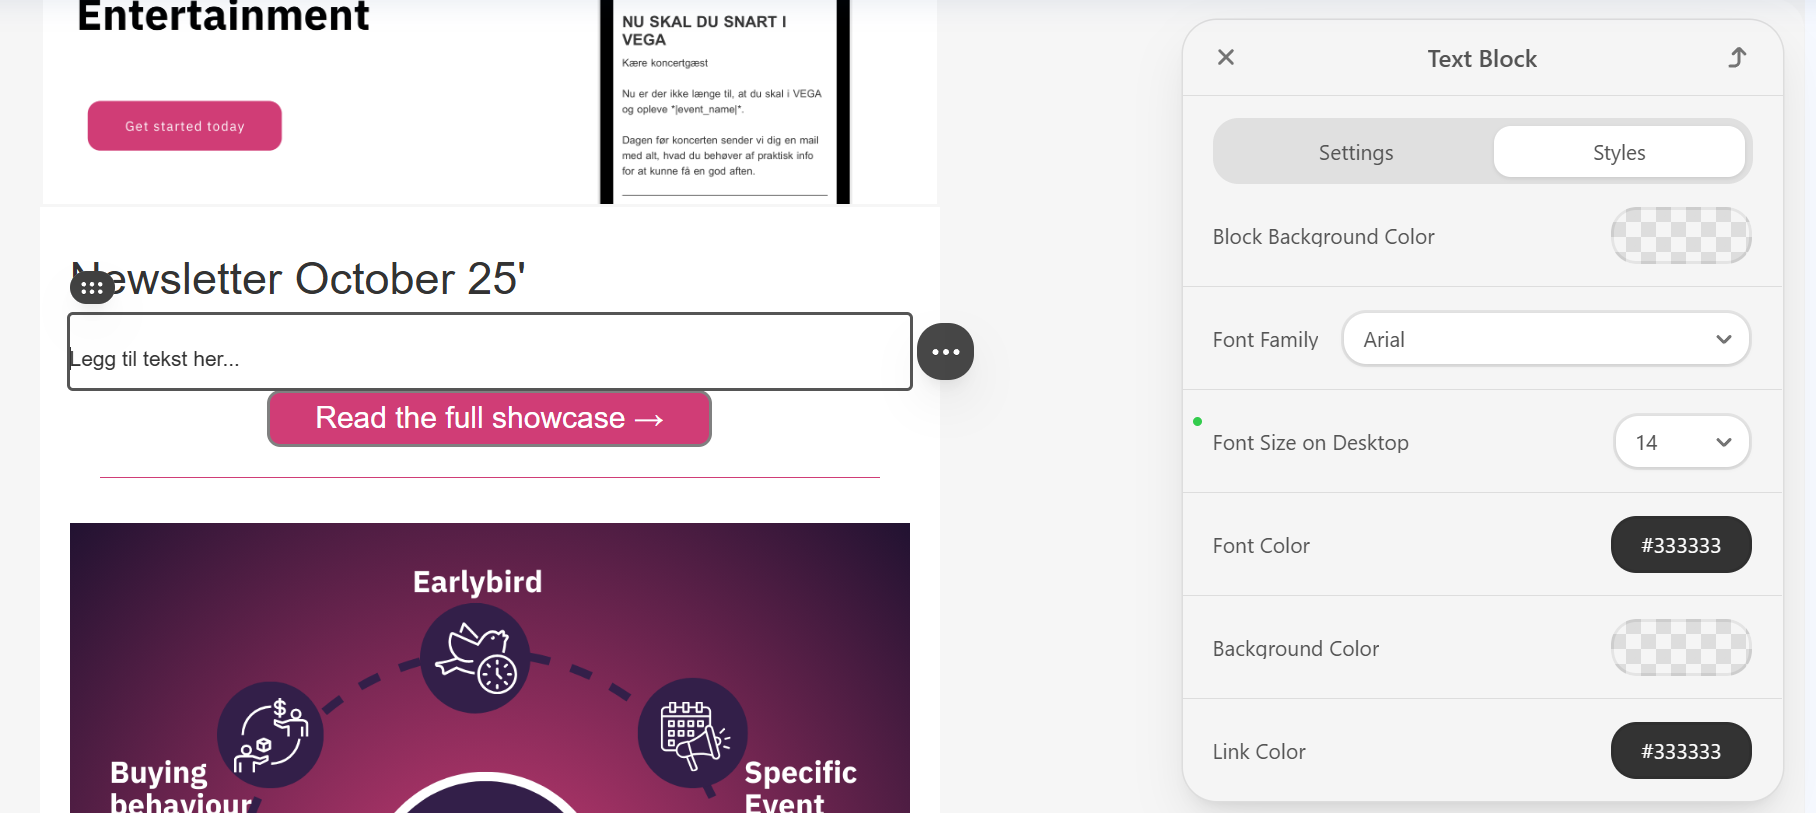
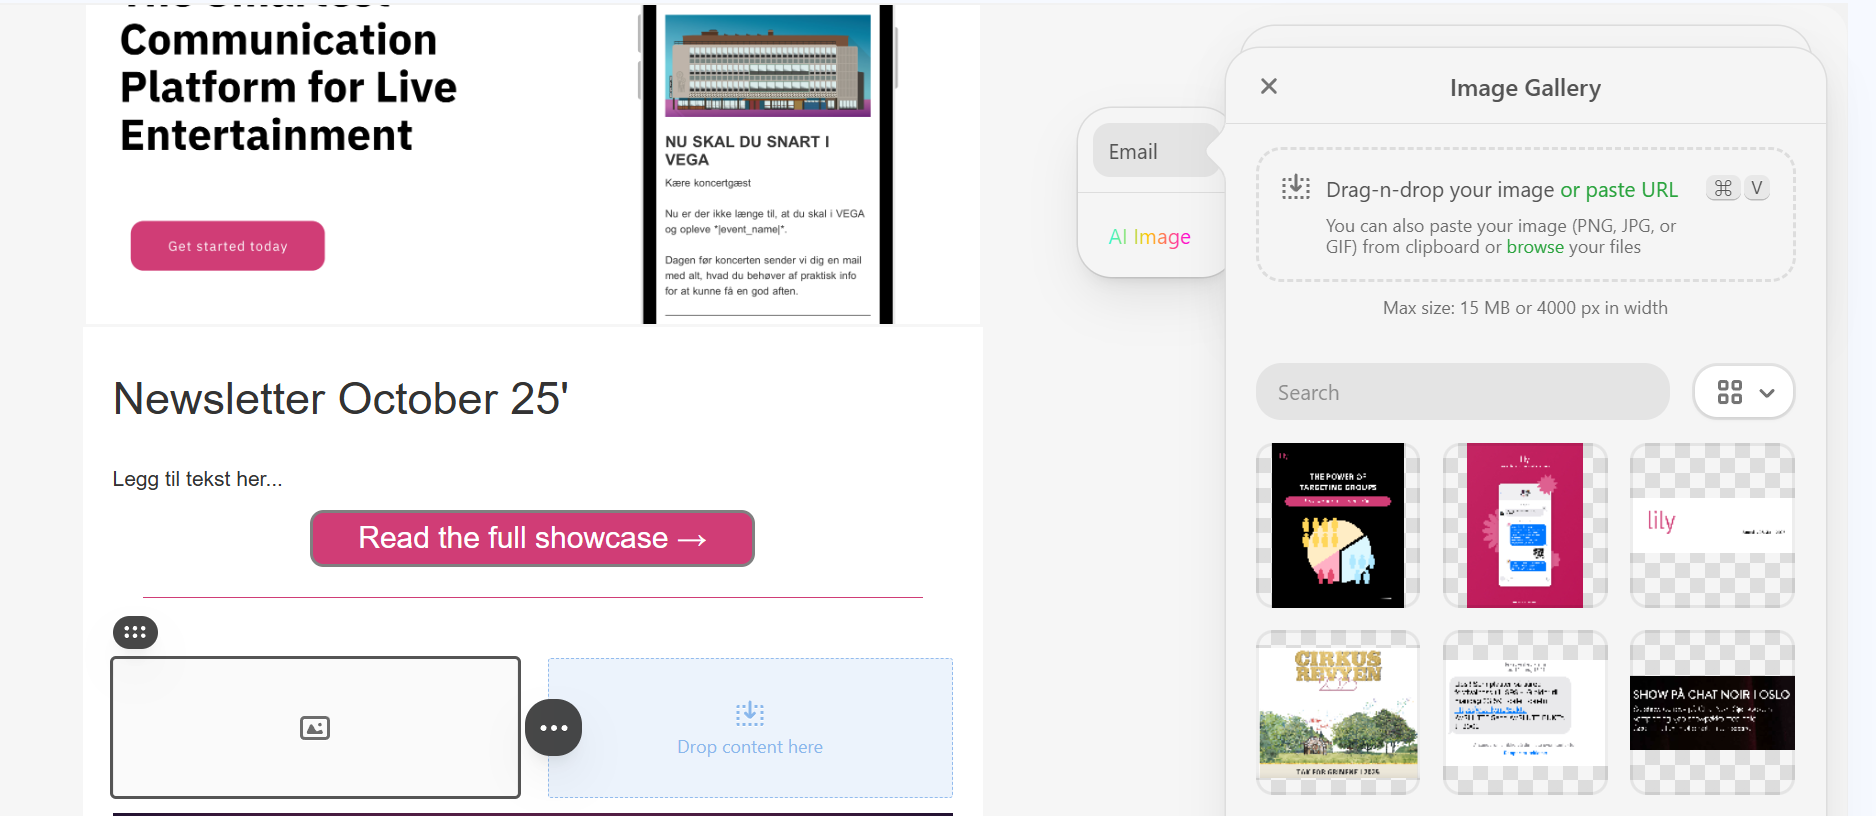
To insert or change an image, follow the same steps as when changing your header:
Editing Images: Click the “Edit Image” Icon, next to the “Change Image” icon.
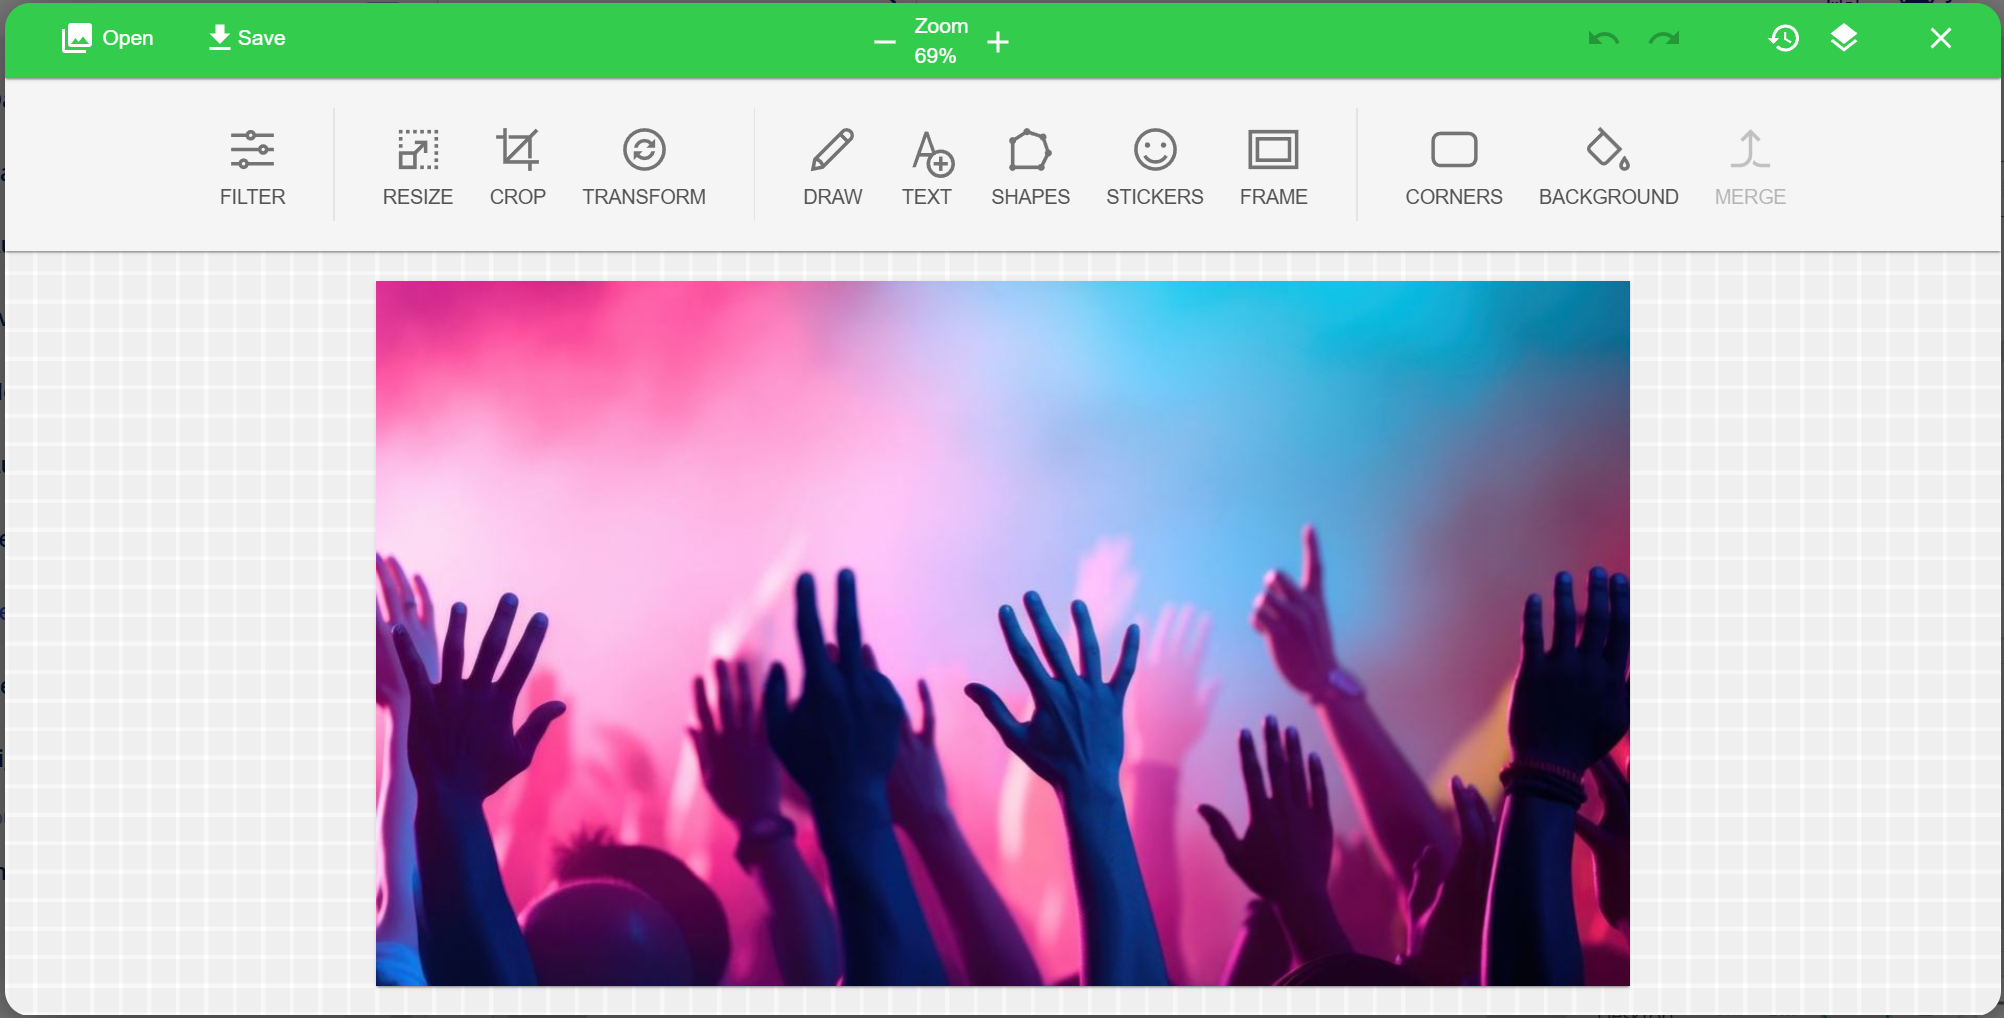
Then you will be redirected to the image editor where you can for instance crop, resize, draw and change the background color of your image. You can also add text and frames. Then you click on save and your changes will appear.
In the Blocks section, drag a Button Block into your email. Then you can choose between different editing options in Settings and Styles.
To create breathing room between sections, drag a spacer block into your layout. You can adjust its height, width and color in the right-hand editor panel.
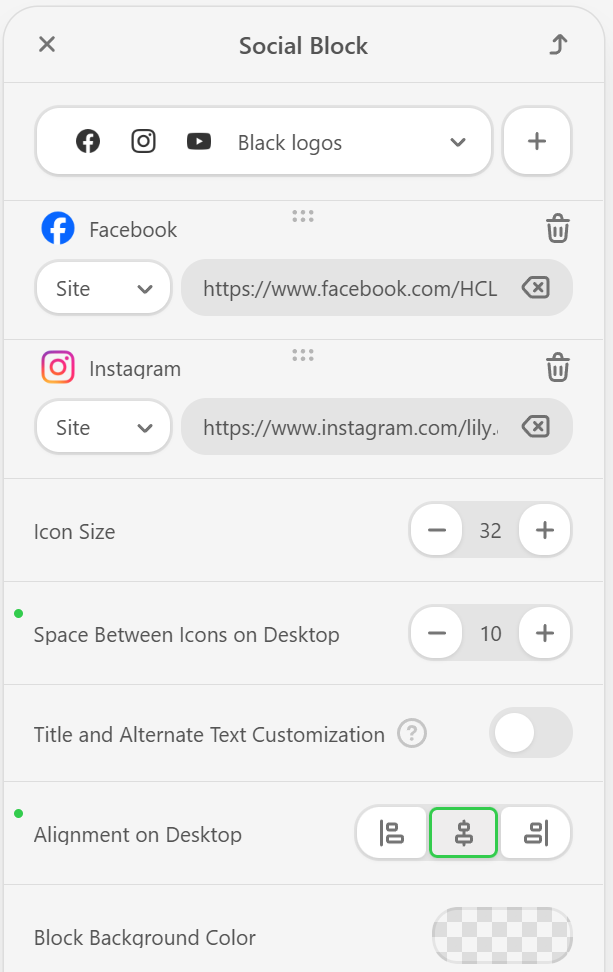
Add your social media links by dragging in the Social Block from the left panel. You can:
At the top of the builder, you can now switch between mobile and desktop view to preview your design instantly. This makes it easier to ensure your template looks great on a mobile device as well.
However, we always recommend to send a test at the bottom of the preview pop-up, and check your template on different email platforms, both on desktop and phone, as well as with and without dark mode (on iPhone especially).
With Lily’s new AI Subject Line Generator, you can now create effective, personalized subject lines directly inside your template, saving you time and effort when setting up campaigns.
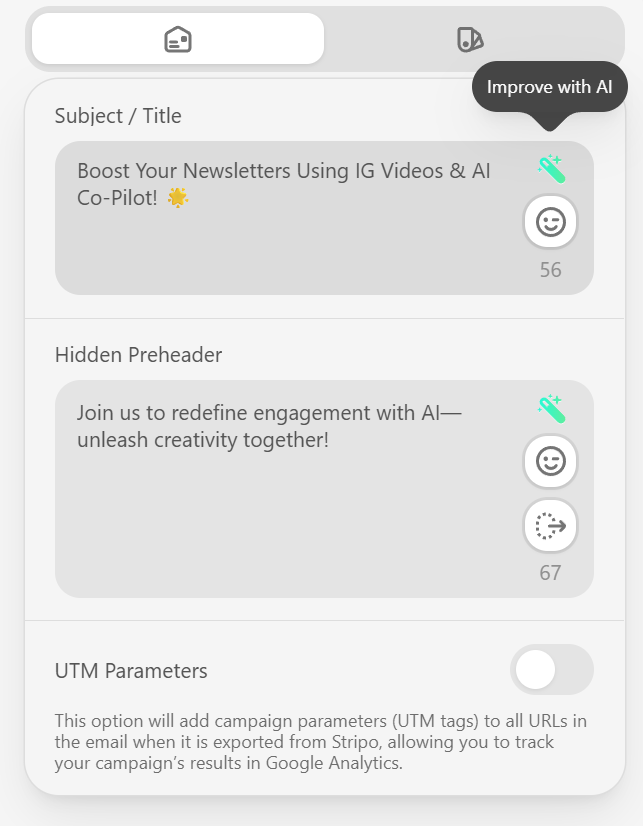
When you write or generate a subject line in your template, it will automatically appear in your Campaigns, so there’s no need to re-enter or copy it later. This ensures consistency across your email setup and helps you get campaigns out faster.
To use it:
Tip: Use the AI generator to test different tones or styles — such as creative, informative, or promotional — and see which ones drive the best open rates.
When you’re ready to save:
Final Tip: Start with a Lily Template to save time, they come with pre-built structures and styles that match best practices for readability and performance.
This section will cover how to set up a signup form in Lily. You can create as many signup forms as you need, depending on how and where you want to post these forms to collect new marketing consents. These will then show up in your Audience segment, where you can create an Audience for your signup form and create tailored newsletters and campaigns.
You can also connect a signup form to Automatios, so that when a new person sign up, they will automatically receive a scheduled email thanking them for subscribing etc.
Below, you will find all the steps you need in order to create this form:

To add a signup form to your website you must scroll down to the "Embedded form" section, and add this to your website. You just copy and paste the code shown in the grey box into your website. The code will load the signup form automatically from Lily’s platform, so you don’t need to build the form yourself. It also shows how to mark required fields. If some fields must be filled out (like name or email), you can add a red asterisk * next to the label. Just use the small bit of CSS code at the bottom. This helps them know which fields they must complete before submitting the form.
“Campaigns/Push” is the area in Lily where you prepare and send email and SMS campaigns directly to your audience, both ticket buyers and marketing consents. This function is mainly used for:
1. Marketing a specific event where you wish to sell more tickets, or send out last minute information directly to your ticket buyers.
2. Newsletter campaigns to your marketing consents, which you have created in the templates section.
The procedure is the same for both types of campaigns, consisting of 5 steps.
1. Type: When sending out communications, you’ll need to choose between two content types:
These distinctions are essential to ensure compliance with marketing laws. Then you choose which channel you want to use, SMS or email.
2. Target Group: In the second step you can select the audience you want to send your message to, either by selecting it in the drop down menu. If you want to combine multiple audiences, tick the boxes below for the ones you want to add to your campaign.
3. Content: Then, you choose your email subject line, or the message content of your SMS campaign. If you are sending an e-mail, you only have to decide on your campaign's subject line, such as “Welcome to this week's newsletter from X”.
For SMS campaigns, you add your text and a CTA link, usually a link for purchasing tickets to your event. The unsubscribe link will automatically be added, so you will not need to include this, which is also why it will say a higher number of total characters, because it will include the characters from the unsub line. Your messages can only include 160 characters, if it exceeds this limit it will be considered as 2 and the cost per SMS will be double (Just keep this in mind).
4. Review: For SMS, you'll see the full message, including the unsubscribe line, but without your selected spacings. To ensure it appears correctly for your audience, send yourself a test message:
A confirmation message will appear, clarifying that this is just a test and not being sent to your full audience. This allows you to adjust spacing and text length as needed. Once satisfied, uncheck the test button and schedule your SMS for delivery.
For email, the process is similar, but you'll need to select the correct template before proceeding. Ensure your template is saved under Campaigns in the Templates section. We strongly recommend sending a test email to yourself to check how it appears on both desktop and mobile before finalizing your send.
5. Receipt: In the final step you will get a Receipt about the state of your sending. If it went well, you would get a success message: “The batch is sent!” also showing how many people will receive it.
In this section, you get an overview of your preplanned email campaigns, called Automations These scheduled campaigns go out at a specific time before your events, after events or after a ticket purchase. Lily can send out your preplanned emails to an ever-growing list of recipients, streamlining this area of communication.
Lily groups the campaigns into four sections: Before event, After event, Thank you, and Signup form messages sent after a ticket purchase.
Before event is usually sent out 1-3 days prior to the recipientsevent, to inform about possible changes, opening hours and other necessary info.
After event can be sent out to thank you for visiting your venue, inform about your upcoming events, specialoffers etc.
Thank you messages can be used to thank the recipient immediately after purchasing a ticket, with sections including discounts if they bring a friend or similar, as well as other special offers or important information etc.
Signup Form is an preplanned email campaign created whenever a new person signs up to the corresponding signup form.
In each of these sections, you can review the following:
The following steps will explain how to set up an automation in your Lily account. Bear in mind that automations must be scheduled at least one day in advance, before 12pm. So, if you want an automation to go out on Wednesday, you’ll need to set it up by 12pm on Tuesday at the latest.
Step 1. On your dashboard you scroll down to "Active automations" and click on the "Set up new" button. Here you choose your automation type (before, after or thank you), and click on "Add".
Step 2: Then you will be redirected to the Automation edit page, where you firstly give it a name. Then, in the "Description field" shortly describe the automation and what it is for.

Step 3. If you want to send out an SMS in addition to the automated email, you can do so in the "SMS text" field, using the variables [event_name], [event_date], [event_time], [event_location] as placeholders.
Step 4. Upload your template, and make sure to preview afterwards to see if everything looks correct. Then you click save automation.

Step 5. Thereafter, you choose a send time, for instance 7 days before the event at 10am, and click on save. You can also add several send times, as the image illustrates. Then, the same email will go out at your chosen times.
Step 6. In the "edit settings'' section you can choose your settings for the automation. You can enable or pause, choose to send it out via email or SMS, in addition to sending yourself a test. When you've chosen the settings you want, you click save and the automation will be up and running!
Step 7. If your automation is going to a specific event, or you want to exclude an event from receiving the automation, you need to add a rule in the “Rules” section. A window will pop up where you first filter the rule by i.e. Event name, date, code etc depending on your needs. Then you choose the rule type, and paste the rule expression in the type field. For example:
For example:
Step 8. To send out a test email, you have to go to the Automation section on the left hand side in Lily, find the one you created, click on the arrow next to the automation title and click on "show campaigns''. Here you can preview one of the campaigns Lily has created and scroll down to the "send test-mail" section.
Is your event canceled? Then you also have to cancel your automation! Until midnight the day before the event, the automation must be canceled. Some ticket systems automatically cancel in Lily, some DON'T! Important information about your ticket system and canceling in Lily:
BUT: Eventim customers WITHOUT a JSON feed do not automatically cancel events in Lily.
Eventim customers WITH an event feed (currently only Vega) have events canceled and updated every hour.
Ticketmaster: events are canceled if the cancellation is made the day before.
Other ticketing systems: need to check.
The "Automated Newsletter" is empowering you to effortlessly connect with all contacts who have granted marketing consent, or have visited your venue. Keep your audience informed with the most recent news and insights without having to create a new template for each sendout. Create an automated newsletter step by step by following the guide below.
Step 1: Select Template

Upload a new standard template for the newsletter, if you have created your own template. Our skilled designers can assist you in creating the standard template for your newsletters, incorporating your branding, fonts, and logos, after your first “onboarding meeting”.
If you created the template using the Lily Template Builder, your template will appear automatically here for you to select.
Select the design you like the most. Then go to the next step.
Step 2: Add events you would like to promote
Add events by several options; days ahead, tickets sold, categories or location. Why not all of them? Tailor the newsletter to you specific needs and goals of the campaign!
There are 4 different options for segmenting the different events that will automatically appear in your newsletter.
Tickets sold from %: Write the lowest % sold of your upcoming events, or a higher % of your choice.
Tickets sold to %: Write the highest % sold of your upcoming events.
Add events from the interval by your choice.
You can create several combinations of options!
Added events will be shown to the right, and will automatically be included in your newsletter feed of upcoming events.
Step 3: Select Audience
Select the audience you want to connect with.
You may choose between all marketing consents, test audience, tester audience and ticket buyers for the last two years.
The audience you select, will receive your newsletter.
Total recipients: x fans in your selected audience.
Audience table: personal information about your audience.
Step 4: Preview and edit newsletter
In this section, you are able to see the added events in your automated newsletter.
Lily goes the extra mile by incorporating images, links, and other pertinent details that you have included in the ticket system, enhancing the visual appeal and informativeness of your newsletter.
Even when it`s automated, you still have control. Edit directly in the preview, and make the changes yourself.
Step 5: Schedule testing
Before reaching your audience, each newsletter undergoes rigorous testing. Nothing is sent without your explicit approval, ensuring that the content aligns with your expectations in both appearance and readability.
Choose “test only” and “test recipients”, which may be your own email. Then type in an email subject, and schedule your testing
Step 6: Schedule sending
Stay in the same section, and remove the “test only” button. Determine the frequency of your newsletter send-out and choose the optimal day and time for distribution to your audience.
Push “confirm and send”.
We’ve made it easier, and smarter, to design engaging and beautiful newsletters, campaigns and automations here in Lily. With this brand-new version of our Template Builder, you can now create, customize and test templates faster than ever before. Here's how it works…
Start by clicking on the “Create new template” button in the top right corner. You’ll arrive at the new Template Library, where you can:
Tip: Remember to click Save Template regularly while working, as your progress isn’t auto-saved!
The new design gives you a clear overview and quick access to everything you need:
Message width: Choose the width of your newsletter, push, or automation (max. 600px).
Message alignment: Decide whether your message should be centered or aligned to one side.
Default padding: Adjust margins on the sides (e.g., 20 left and 20 right).
General background color & font: Set a default background color and font for your email.
Tip: You can also go to Message Settings (In the global styles tab, top left button/icon) to:
Select the “Heading tab” to define your tile styles. Here you can:
This helps you keep newsletters consistent and on-brand.
When starting from scratch, click on the “Insert header here” block, where the image tab will appear on the right hand side. Click on the round icon “Replace Image”, and:
To edit text:
To insert or change an image, follow the same steps as when changing your header:
Editing Images: Click the “Edit Image” Icon, next to the “Change Image” icon.
Then you will be redirected to the image editor where you can for instance crop, resize, draw and change the background color of your image. You can also add text and frames. Then you click on save and your changes will appear.
In the Blocks section, drag a Button Block into your email. Then you can choose between different editing options in Settings and Styles.
To create breathing room between sections, drag a spacer block into your layout. You can adjust its height, width and color in the right-hand editor panel.
Add your social media links by dragging in the Social Block from the left panel. You can:
At the top of the builder, you can now switch between mobile and desktop view to preview your design instantly. This makes it easier to ensure your template looks great on a mobile device as well.
However, we always recommend to send a test at the bottom of the preview pop-up, and check your template on different email platforms, both on desktop and phone, as well as with and without dark mode (on iPhone especially).
With Lily’s new AI Subject Line Generator, you can now create effective, personalized subject lines directly inside your template, saving you time and effort when setting up campaigns.
When you write or generate a subject line in your template, it will automatically appear in your Campaigns, so there’s no need to re-enter or copy it later. This ensures consistency across your email setup and helps you get campaigns out faster.
To use it:
Tip: Use the AI generator to test different tones or styles — such as creative, informative, or promotional — and see which ones drive the best open rates.
When you’re ready to save:
Final Tip: Start with a Lily Template to save time, they come with pre-built structures and styles that match best practices for readability and performance.
This section will cover how to set up a signup form in Lily. You can create as many signup forms as you need, depending on how and where you want to post these forms to collect new marketing consents. These will then show up in your Audience segment, where you can create an Audience for your signup form and create tailored newsletters and campaigns.
You can also connect a signup form to Automatios, so that when a new person sign up, they will automatically receive a scheduled email thanking them for subscribing etc.
Below, you will find all the steps you need in order to create this form:
To add a signup form to your website you must scroll down to the "Embedded form" section, and add this to your website. You just copy and paste the code shown in the grey box into your website. The code will load the signup form automatically from Lily’s platform, so you don’t need to build the form yourself. It also shows how to mark required fields. If some fields must be filled out (like name or email), you can add a red asterisk * next to the label. Just use the small bit of CSS code at the bottom. This helps them know which fields they must complete before submitting the form.
Lily makes a large amount of data available about your customers. Here are the reports and analytics sections that are available out of the box:
On the left hand side you find Reports, which gives you an overview of all your previous and scheduled email & SMS campaigns. You can see that you can get insights into when each campaign was scheduled and sent, and key metrics such as recipients, click and open rate.
Then, you can also click on each individual campaign, and get even more in-depth data and insights into how the campaign went and what results it generated:

When you log into your dashboard, you are given a clear, data-driven overview of how your marketing is performing and how your audience is engaging with your events. Below, you will find an overview of each of these sections on your dashboard.
Firstly, you’ll see several key popups that provide valuable insights into your marketing and audience data. Here’s what each one means:

These popups give you instant access to key marketing and audience insights, helping you make data-driven decisions effortlessly!
This section displays updated ticket sales data about your upcoming concerts.
It is much easier to prioritize and take action based on this overview.

In this section, you’ll find data about your most dedicated customers and how many purchases they have made.
We encourage Lily users to benefit from this information by making their best customers feel special – by reaching out to them, giving them discounts, or some other offer.

This section makes it easy to track how your sales are going filtered by days, weeks and the last 6 months.
You can view the number of orders and tickets sold over the last 6 months, the past few weeks, and each day within the last month.


We are committed to helping our customers get the most out of Lily.
In addition to user documentation like this guide, we regularly publish relevant content on our blog. We offer guides to different aspects of marketing, customer dialogue, customer data and more.
When you become a Lily customer, we integrate Lily with your ticket system, making customer data available six years back. Your data in Lily is being updated daily through this integration.
More than 30 different types of metadata are scraped from the ticket system and become structured in Lily.
One of the most important pieces of data is the marketing consent – helping you keep your customer dialogue on the right side of the marketing laws.
Our recommendation for new users is to get familiar with the navigation quickly. Log into your account as soon as possible and have a look around the platform and explore its possibilities and functions.
Next, we suggest you create a test audience to go through the Push events process. For most of our customers, this is the most impactful tool in Lily. Mastering it will give you superpowers in reaching your customers with the right message at the right time.
Furthermore, check out your automations and try adding a new one. You can also try and create a newsletter template and send it out to your test audience after adding a couple of upcoming events.
You will find all the additional resources you need in the Need help? section in the personal menu in the upper right corner.
We regularly add to our resources on the Lily blog and make the most useful posts available directly on the Lily website.
